Showing posts with label cookies and more!!!. Show all posts

Wednesday, May 11, 2016

Eggless Chocochip Cookies


Chocochip cookies were always on my to cook list ,but somehow it got postponed .Finally with some encouragement from my sister -in-law to bake something in her vintage stove top oven I finally decided to give these cookies a try and got the recipe from here and tailor made it according to my taste.These Chocochip cookies were absolutely crunchy and make you want to eat more again and again .we finished this batch in a day itself.


Makes:15-17 cookies
Preparation time :30 mins

Ingredients
  • 1 cup whole wheat flour or plain flour
  • ⅓ cup powdered sugar (I used turbinado sugar)
  • ⅓ cup butter,at room temperature.
  • ½ cup chocolate chips
  • 1/2 tsp pure vanilla extract
  • A little milk to make the dough

Procedure:

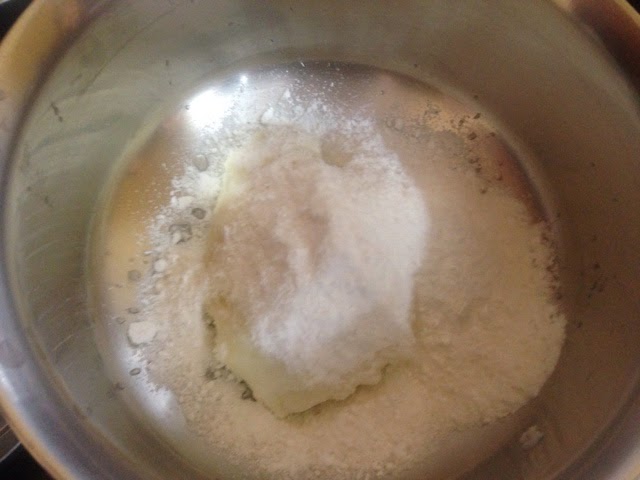
1.Preheat oven at 180C.In a bowl cream the butter and sugar together .


2.Then add the vanilla extract and the flour and mix well.


3.The mixture will look like below (like crumbled).Add the chocochips and a little milk.


4.Mix well and gather it like a cookie dough.Then take a small portion of the dough in hand and flatten it.


5.Place the flattened dough on the baking tray which is greased priorly. Bake them at 180 C for 10-12 mins or till the cookies are baked.The cookies will be soft initially but after it cools down it turns very crunchy.Yummy Chocochip Cookies are ready to be served. Store them in an airtight container.


Tips:

  • The original recipe called for 1/4 tsp of baking powder but I omitted it. The cookies came out well even without adding it.You can add it if you wish.
  • For a dark Chocochip cookie you can add 1 tbsp of cocoa powder to the dough. 


Thursday, May 5, 2016

Mum's Homemade Fruit Jam(No preservatives)


This is my 100 th post and I am glad it's very sweet.I am not a great fan of jams but son indeed is .But I don prefer the store brought ones though they are tasty.They are loaded with chemicals like food colors,preservatives and artificial flavors which trigger allergy and wheezing in kids.As I was refusing to buy my son jam,my mom sent me a bottle of delicious homemade mixed fruit jam with no preservatives and has the goodness of the real fruits .My son loved it and the bottle got over in a month.I wanted to try it and got an opportunity to make it this time at my mom's place where I am right now , spending my summer vacation .


Preparation time :30 mins
Prepares:150g approx

Ingredients:

Mixed fruit pulp (papaya,chickoo,mango,banana,Apple)-2cups
Sugar-2 cups
Lemon juice-1 tsp
Tonovin essence -1 tsp


Procedure :

1.Heat a wok and add the fruit pulp and sugar and keep mixing well in medium flame .

2.Once all the sugar has dissolved,add the lemon juice and mix well.


3.Once the mixture starts to thicken ,add the tonovin essence.


4.Keep on mixing and the mixture turns glossy and dark in color. Simmer the flame.


5.Glass jars are generally preferred for jams and one must wash it with soap and hot water and air dry it beforehand.As I didn't have an appropriate glass  jar I used a stainless steel one.But please do not use plastic ones even if they are food grade.The  right stage for the jam to be ready is when you  drop a spoon of jam on a plate it should stay still like a pearl or not runny.Then our jam is ready.


6.Transfer the jam to the jar and once it cools down you can refrigerate it .Stays well for upto 2 months in the fridge and when used a clean and dry spoon for use.Enjoy this delicious ,healthy and wholesome homemade mixed fruit jam .


Tips:

*If you miss the pearl stage then the jam may get too rubbery and difficult to spread.
*I didn't add pineapple as I would like it to eat as a pineapple jam.
*Glass jars are always better to store jam.It should be clean and dry.
*Tonovin essence adds a nice flavor and color to the jam so better to add it.

Friday, April 29, 2016

Nan Khatai -An Indian Flavoured Cookie


Only after entering the blogging field ,I came to know about these delicious cookies-Nan Khatai. Also I read that these  cookies are made during festivals like Diwali in the north part of our country.They are more Indian in flavour as we use gram flour or besan ,ghee and cardamom to make these cookies.The pistachios on top add a very nice crunch to these nan khatais .So I made these during last Diwali for the first time and everyone at home enjoyed it a lot.


Preparation time:40 mins
Makes about 25 cookies

Ingredients:

Maida or All purpose flour - 1/2 cup
Whole Wheat Flour or atta- 1/2 cup
Besan Or Gram flour - 1/2 cup
Melted Ghee - 1/2 cup
Powdered Sugar - 1/2 cup
Cardamom Powder - 1/2 tsp
Baking Powder - 1/2 tsp
Baking Soda - 1/4 tsp
Milk - 2 tbsp
Pistachios -few

Procedure:

1.Sift all the flours along with the baking powder and the baking soda in a bowl.Grind the cardamom pods with the sugar in a mixer to a fine powder.


2.Transfer the sugar and cardamom mixture to the flours and mix well. 


3.Chop the pistachios finely and add the melted ghee to the flour mixture and mix well .


4.Mix well and gather it to make a dough.If the dough is too dry then you can add a tsp
of milk.


5.Take a small amount of the dough and make a ball and press it slightly in the form of a cookie. Meanwhile preheat the oven to 180 degree C .Top each cookie with few pistachios and line it on the baking tray .


6.Bake them for 18-20 mins at 180 C till it is done and bottom of the cookie is golden brown .


7.The delicious and crunchy Nan Khatais are ready to be served.After it cools down transfer the cookies to an air tight container .


Tips:

  • You can make these cookies with only maida and besan alone.In that case replace whole wheat flour with maida.
  •  You can add melted butter to make these but ghee adds a rich and desi flavour to the Nan Khatais .


Sunday, December 27, 2015

Ragi Cookies(Finger Millet Cookies)


Merry Christmas and a Happy New Year to all my friends!Once when I went for shopping instead of getting plain Ragi flour I got sprouted and roasted Ragi flour.The moment I opened the pack the aroma made me read the label again .I just loved the smell and immediately I wanted to make cookies using this roasted Ragi flour. My son loves chocolate cookies and these cookies would be an ideal and healthy substitute (atleast I could trick him!) These cookies were crunchy and light.


Makes:around 20 cookies
Preparation time:35 mins

Ingredients:
Roasted Ragi Flour/Finger Millet Flour-1/2 cup
Whole Wheat Flour-1/2 cup
Powdered Sugar-1/2 cup
Butter-1/2 cup
Baking powder-1 tsp
Vanilla essence -1 tsp
Milk -if needed to make the dough

Procedure:

1.Sift Ragi flour,whole wheat flour and baking powder together.To this flour mixture add the butter.


2.Mix the butter well and add the powdered sugar to it.


3.Add the vanilla essence also and mix well to form a cookie dough.Add a little milk if the dough is too dry.


4.Take a small portion of the dough and make a small all and flatten it on a greased baking tray . Using fork you can create the pattern on the cookie as I did.


5. Pre-heat the oven to 180 degrees Centigrade and place the baking tray and bake the cookies for 15-18 mins.


6. Ragi Cookies are ready . Once they are out of the oven,they are soft but once cooled , they turn crispy. Store them in an air tight jar for up to a week.


Tips:
* You can use cardamom powder instead of vanilla essence.
*Powdered jaggery can be added instead of sugar. 

Monday, June 22, 2015

Eggless chocolate cake


I never miss out an opportunity to bake a cake and when I got to meet a friend of mine who was pregnant I baked her this super delicious and simple eggless chocolate cake with Nutella as a frosting .
When I searched my recipe diary , I got this easy recipe which I had written 4 years back.
As soon as I opened my diary and saw the recipe, it brought me old memories of my days in Bangalore when my son was a 7 months baby .He used to sleep a lot during daytime(don't ask me about nights! I had sleepless nights  as my kid will be awake at that time!) and I had some time to bake or cook few new recipes.I used to browse a lot and even referred a lot of magazines to try new stuff.And I started writing those recipes in my diary. I had no convection oven at that time and I used to bake my cakes in my microwave using trial and error method.After few bad outcomes I understood my microwave and finally arrived at the correct time for baking cakes.The results are not as you get in a convection oven but they were pretty decent and no one guessed that I used a microwave for baking the cake they ate!

Now that I have the convection,I tried this cake nearly after 4 years and the outcome was as usual a lovely moist and yummy eggless chocolate cake !


Preparation time:45 mins
Serves:4

Ingredients:
All purpose flour/maida-1 and 1/2 cups
Sugar-1 cup
salt-1/4 tsp
Oil-1/4 cup
Cocoa powder-4 tsp
Vanilla extract-1/2 tsp
Baking powder-1 tsp
water-1/2 cup

For topping:
Nutella-100 gms

Procedure:

1.Sift together flour,cocoa powder,salt and baking powder together.


2.Mix water,sugar,oil and vanilla extract till sugar dissolves completely.


3.Add the flour mixture to the liquid mixture one tablespoon at a time.Mix well to form a uniform cake dough.


4.Grease a baking dish and pour the batter in to it and bake for atleast 30-35 min at 350F.


5.Let it cool and then top it with Nutella evenly and then serve.


Tips:

*You can replace water with milk if you are not vegan.
*Similarly oil can be replaced by equivalent amount of butter.But oil gives best results for this cake.
*If using microwave then bake it at high power for about 4 to 4 and a 1/2 mins.Time changes with different models.Check for a toothpick to come out clean if correctly baked.
*You can also use 

Saturday, June 13, 2015

Quinoa dates cookies/Thinai dates cookies/Foxtail Millet and Dates Cookies


Millet cookies which are available at our local supermarkets in Chennai never fail to attract us and my son likes the taste of these cookies too.As I didn't have an oven before I never even had an idea to give it a try but after buying an oven and having tried few other cookies I wanted to try millet cookies at home and few months back, my blogger friend Jayanthi Sindhiya posted a recipe on millet cookies which kindled my curiosity to bake these cookies.Finally I got millet flour from the shop and baked these goodies.The outcome was soft (cake like)quinoa or foxtail millet cookies which we all relished a lot.As I added dates purée the cookies were soft but very tasty and definitely worth a try.Kids who detest dates too will love these cookies and these cookies are gluten free and could be made as vegan too by adding oil instead of butter .


Ingredients:

Organic quinoa flour/Thinai flour/foxtail millet flour-1 and 1/2 cups
Dates-10 to 12 no
Sugar-8 tbsp
Butter-5 tbsp
Baking soda-1/2 tsp
Coarsely powdered almonds/almond meal-1/4 cup
Vanilla extract-1 tsp
Few almonds-for garnish


Procedure :

1.Soak the dates in hot water and grind it to a coarse paste adding as little water as possible. .

2.In a bowl sieve together the Foxtail millet flour(Thinai Mavu ) and baking soda .


3. In another bowl add butter,powdered sugar and dates paste.

4,To this date mixture add vanilla extract also and mix well .


5.To this wet mixture add the millet flour and powdered almonds or almond meal.


6.Bring them together to form a cookie dough and make small balls.Flatten them a little on the greased baking cookie tray ,decorate it with an almond in middle and bake them at 200 C for 20-25 mins .


7.After baking ,cool them for few minutes and transfer them to an airtight container.It can be stored for up to a week.Yummy and delicous Quinoa Dates Cookies are ready.Enjoy them with a cup of tea or coffee.


Tips:


*For more firm or crisp cookies add more butter.
*Increase the quantity of sugar if you have a sweet tooth.But keep in mind that even dates are sweeter.

Saturday, February 28, 2015

Coconut whole wheat cookies


The moment I started baking cookies at home ,my son preferred home baked cookies than the store brought ones.This excited me a lot and made to try different  varieties of cookies.I try my best to bake cookies using whole wheat flour or oats or millets compared to their less healthy counterpart maida or all purpose flour .These cookies were super crunchy with a  nice coconut flavour. I like my cookies to be thin but you can make it a bit thick according to your need and like .It is perfect for gifting someone on a special occasion or festival .Believe me, nobody will  know that these cookies were made of whole wheat flour,as it will be super tasty and crunchy.


Makes:30 thin cookies
Preparation time:45 mins

Ingredients :

Whole wheat flour-1 cup
Butter-1/2 cup
Dedicated coconut -1/2 cup
Powdered sugar-1/2 cup
Baking powder-1/4 tsp

Procedure:

1.Preheat the oven to 175 C .cream the butter and powdered sugar to a creamy consistency in a bowl.


2.Add the whole wheat flour and the baking powder to the butter and sugar mixture and mix well.


3.Finally add the desiccated coconut and mix well to a pliable dough.


4.Take a small portion of the cookie dough and roll in to a ball and flatten on a cookie tray (if aluminum grease and keep it ready).Use a fork and press it to get the below pattern.


5.Bake them for 18-20 mins at 175 C or until the bottom of the cookie is golden brown.The cookie will be soft when hot but after it cools down it becomes very crispy.Enjoy it with your favorite beverage .

Tips:

* You can use ghee or clarified butter instead of butter.
* The amount of sugar was right for me but you can adjust it according your wish.
* You can add crushed nuts for an added flavour and texture.
* Baking time might differ from oven to oven .so watch out till the bottom of the cookies are golden brown.