Showing posts with label Krishna Jayanthi Recipes. Show all posts

Thursday, April 16, 2015

Ulundu vadai /Medhu vadai recipe( Lentil Fritters)


Who doesn't like the crispy Medhu Vadai? I wanted to post this recipe for a long time but somehow it got postponed ! Though the ingredients are simple making a perfect vadai which is crispy on the outside and soft and airy on the inside is a skilled task which one can maneuver through practice. My initial vadais were either too hard or the batter was too watery and absorbed more oil. Then I asked my mom for some tips to get a perfect vadai and also took few ideas from vahchef and finally started making nice and perfect vadais.

The outcome will be great if you use a wet grinder to make the batter but for a small family of two or three ,grinding in wet grinder would be a huge amount of effort and a waste of time.So there are some points to take care when grinding in a mixer or blender and voila you can achieve the same great result from your mixie. Also make sure to use a good quality urad dal as it plays an important role in getting perfect vadais.

So please read every step in the procedure and follow them to get good vadais.


Preparation time:20 mins(+1 hour for soaking)
Makes:12 to 15 vadas

Ingredients:

Urad dal or ulundu -1 cup
Green chillies-2(based on your spice level)
Curry leaves-few
Asafetida or Hing-1 tsp
Salt - to taste
Finely chopped onion-1 no
Finely chopped coriander leaves-1 tbsp( optional) oil- to fry

Procedure:

1.Soak urad dal along with green chillies and curry leaves for an hour.i used udhayam brand urad dal.


2.After one hour drain all the water and place the ingredients in a mixer and use the pulse mode to beat the ingredients by stopping in between for few seconds.If you feel the mixture is too thick then keep sprinkling water and continue to use the pulse mode for a minute by stopping in between as told above.Then grind it in the normal mode for few seconds and stop.Then repeat it again till the dal has become a smooth and fluffy paste.The stopping in between helps in incorporating air to the batter which helps in getting us a good vada.


3.Add salt,asafoetida and onion to the mixture and stir the mixture by hand for minute.This mixing by hand is very important as it also helps in making the batter light and fluffy.


4.Take a small amount of the batter and drop in to a cup of water .The batter must float .If so, the consistency is correct.if not then keep mixing the batter by hand and try the water test again.Then take a plastic cover or banana leaf and place a small amount of batter on it.Then dip your hand in water and flatten it and pierce a hole in between .


5.Heat oil in a medium heat and drop the vadai in to  it carefully.Then grease the cover or leaf with water and repeat with the next vadai.The application of water to plastic cover or leaf helps in getting the vada out of it easily without sticking to it.


6.Fry till they are golden brown in colour under medium heat so that it ensured even cooking of vadas. 


7.Serve hot with coconut chutney.It tastes great just like that and hence I couldn't resist!


Tips:
  • Use very little water by sprinkling as needed.Do not add at one stretch as the batter may become watery.
  • Avoid onions if you do not want them.
  • You can add a small piece of ginger to the urad dal before grinding.
  • Instead of green chillies,you can either add whole peppercorns or pepper powder.


Friday, August 15, 2014

Uppu Seedai and Vella Seedai

Uppu Seedai(Savory Rice Crisps)


My mom makes a lot of items for Krishna Jayanthi fasting the entire day till pooja.As a kid we used to help her in making thattais and rolling out seedais.But I never knew what went in to the dough for these things and how it is fried.After marriage ,I used to make mullu murrukku,thattai,therattupal,vadai and payasam for Krishna jayanthi because I was scared of the fact that the Seedais will burst when frying if you don't prepare it correctly(actually I was a bit lazy too as preparing these seedais meant a lot of work).After about 5 years of marriage and after starting this blog,I had no option but to try Seedais this time for Krishna Jayanthi.I got this recipe from my mom and I also read a lot of stuff on internet about why seedai bursts.

My inferences are:
1.All the dry ingredients used in seedai should not contain any moisture at all.So dry roast all the flours or coconut(used in vella seedai) till the moisture is gone.
2.Both the rice flour as well as the urad dal flour should not contain any lumps I mean they should be a real fine powder.So sieve them really well.
3.Roll the seedais with less pressure and not too firmly.If you roll them very firmly then the seedais will burst when deep frying when the hot vapour tries to escape out of it.If you are sure when rolling then don't worry prick each seedai with a safety pin or a needle so it doesn't burst.
4.Oil temperature must be consistent.Medium flame for Uppu seedai and low flame for Vella seedai.
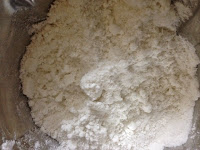
If you ensure the above points then your seedai won't burst.My seedais didn't burst even though I made it for the first time.I followed the traditional method by soaking the rice and drying it and then powdered it.But you can also use the readymade store brought rice flours( use the rice flours specially made for 
kuzhakattais or puttu flour.but sieving and dry roasting is must even for store brought flours).I made everything in less quantities . You can double the ingredients ratio to get more quantity .


Preparation time :1 hour 30 minutes
Cooking time:30 minutes

Ingredients:

Raw Rice flour-1 cup( I used the cup given for the electric rice cooker) approximately 150 gms
Urad dal flour -1 1/2 tbsp
Butter-1 tbsp to 1 1/2 tbsp
White sesame seeds-1 tbsp
Hing-1 tsp
Salt-to taste
Oil- for deep frying 

Procedure:

To make rice flour at home:

1.soak the raw rice for 1 hour.drain the water and spread them on a thin towel for drying.it takes about 15 mins for the grains to dry.


2.After it is dry put it in the mixer and grind it to a fine powder .if you are making in large quantities then you can giving it in a commercial grinding store to make it to a fine powder.


3.Sieve the flour and remove grainy particles.grind the grainy particles with the next batch and sieve again .The flour grounded in a machine from commercial grinding store must also be sieved.
4.Dry roast the flour to remove moisture completely.


5.Your rice flour for uppu seedai and Vella  seedai is ready.

For ready made store brought rice flour:

Follow step3 and step 4 from above method.

To prepare urad flour:

1.Dry roast urad dal in a pan till they turn light pink and nice aroma arises.Do not roast till golden brown.
2.Grind the urad dal in a mixer and sieve it to remove grainy particles.


3 .If you buy store brought urad dal flour then take the specified amount of flour for recipe and dry roast It in pan till nice aroma comes and sieve it.

Preparing uppu seedai :

1.Mix all the ingredients and add water little by little to make it a soft dough from which you can roll out tiny seedais.Do not knead hard like how you make it for chappathi.Use mild pressure and knead it to a dough.


2.Roll them in to balls.make sure you don't roll them too firmly.otherwise it will burst.If required after rolling prick each seedai with a needle or safety pin to avoid bursting.


3.Heat oil in a medium flame and when the oil is hot drop the seedais in the oil by reciting a small prayer to Lord Ganesh.
4.When they turn golden yellow ,take them out and put the next batch into the oil .
5.Store them in a air tight jar after they cool down to ensure freshness.

Vella Seedai(sweet rice crisps)


Ingredients:

Raw rice flour-1 cup(I used electric rice cooker cup)approx 150 gms
Urad dal flour-1 tbsp
Jaggery-1 cup
Scrapped coconut -2 tbsp
White sesame seeds-1 tbsp
Butter-1  tbsp
Oil-for deep frying

Procedure:

1.Prepare rice flour and urad dal flour as given for uppu seedai above(sieve and roast).
2.Dissolve jaggery in little water(1/4 cup water) on heat.once it is dissolved switch off the flame.
3.After it cools down,strain the jaggery water to remove impurities.
4.Dry roast scrapped coconut till the moisture is gone.
5.Mix the rice flour,urad flour,jaggery water,roasted coconut,butter and white sesame seeds and make it to a dough which can be rolled in to Seedais.let it stand for half an hour.
6.Roll them into balls(slightly bigger than uppu seedai).Make sure you don't roll them too firmly or tightly ,otherwise they will burst.You can prick them using a needle to avoid bursting.


7.Heat oil in a low flame and once it is hot  ,drop the seedais and let it turn nice dark brown  on all sides.Don't overheat the oil ,otherwise the seedais will break because it has jaggery which will break in high temperatures.
8.Store them in air tight jar after it cools down.

Wednesday, August 13, 2014

Ambalapuzha Pal Payasam(Sweet Rice Pudding)


Well,what to say... The story is quite long when it comes to pal payasam. Raised in Coimbatore,we used to go to Guruvayur often.Generally we start early in the morning and return  home before evening.Once we decided by afternoon that we will go to Guruvayur and started in the afternoon and we had a nice dharshan in the evening and after the dharshan there was was a big queue separately and when asked , the people in the queue told us it is for prasadam(not the one where we pay and get in counters,this is free).So even we joined the queue and the wait in the queue was worth a million as they gave us the most divine and delicious Ambalapuzha Pal Payasam.It had a light pink tint and absolutely awesome.From that moment,pal payasam become my favorite payasam.The ones made at home by mom was good but never we were able to get a pink tint or that texture served at the temple.
After marriage when I was in London,I used to buy whole milk and tried out pal payasam and within 20 mins in pressure cooker I used to get the perfect pink tint pal payasam.But after coming to India I never  got that pink tint even when tried with full cream milk available in our supermarkets.
For once I gave up making pal payasam at home.After an year or so , I tried pal payasam but this time I didn't use full cream milk and used the 3% fat milk(blue aavin).I kept my fingers crossed and prayed god that it should come out well with that pink tint and creamy texture as that of the temple one.I used my 6 liter anodized cooker and to my surprise the outcome was superb.I think it is due to the fact that I made sure that the cooker didn't whistle throughout the process(my cooker's original whistle was lost and I replaced it with another one ,because of which it didn't whistle anyway).   
So I wanted to share my recipe.It is simple in ingredients but the cooking time is more in order to get that perfect texture.As we are not sweet toothed , I have added less sugar. If you want more you can add it.It will be an ideal prasadam for Krishna Jayanthi.

Cooking time :45 mins to 1 hour
Serves:4

Ingredients:

Raw rice-1/4 cup
Milk-1 liter 
Sugar-1/3 cup( increase if you want it very sweet)

Procedure:

1.In a pressure cooker,heat water upto half it's quantity and wash it well with that  boiling water and throw the water away. This step ensures that the cooker is clean and does not allow milk to curdle. 
2.Now add the milk,washed raw rice and sugar to the cooker and allow the milk to boil.
3.Once it starts to boil, simmer the flame and close the cooker with its lid and put the whistle.
4. It has to be on sim flame for almost an hour and through out this time make sure the cooker don't whistle.If it is about to whistle switch off the flame and after5 mins again switch it on and let it be on sim flame.
5After about 45 mins to 1 hour , switch off the flame. But do not open the cooker. Let it rest like that for another 20 to 30 mins ,after which a delicious Ambalapuzha pal payasam is ready to serve.


Tips:
1.If you want, you can add cardamom powder and temper with ghee fried cashews and raisins but the original recipe does not call for it .
2.After the milk boils,the entire process has to be carried on with a low flame.
3.After done do not open the cooker immediately.open after 20 - 30 mins to get the perfect pal payasam texture.
4.Never fill the pressure cooker more than half of its quantity.My 6 liter pressure cooker was ideal for 1 litre of milk.So,if you have a 3 liter cooker,halve the measurements.The time taken for cooking will also be less.
4.Finally a bit of patience is required otherwise the pal payasam will not get the right texture though it may still taste good.

To know why it is known as Ambalapuzha Pal Payasam in kerela ,Click this link to know the legend: Legend Of Ambalapuzha Pal Payasam