Sunday, December 11, 2016

Thalagam

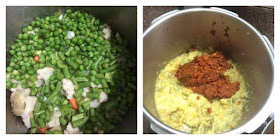
Thiruvadharai always comes in the month of Margazhi with hot flavorful Kali(Sweet rice pudding) and Thalagam a.k.a 7 kari kootu. The name thalagam is mostly associated with the people of Tirunelveli as they have a different method of preparing this 7 kari kootu. I love my mom's way of preparing it and she said that she got the recipe from my aunt(My dad and his family hails from Tirunelveli).In my house we prepare this thalagam frequently and not just on thiruvadharai as all of us love  it.It goes well with hot plain rice and papad or appalam.


Preparation time:30 mins
serves:4

Ingredients:
Mixed large diced vegetables(Yellow pumpkin,white pumpkin,elephant yam(senai),seppankizhangu,Mochai payaru or fresh field beans,carrot,vazhaikai and beans)-350 gms
tamarind-1 small lemon size
fresh grated coconut-1/4 cup
coconut oil-1 tbsp
curry leaves-few
Turmeric powder-1 tsp
hing or asafoetida-1 tsp
salt-as required

To be roasted and grind to a fine paste:
Channa dhal-2 tbsp
Dry red chillies-8 or 9(Depending on your spice level)
Raw rice- 2 tsp
Coriander seeds-1 tsp
Sesame seeds(white)-2 tbsp
curry leaves-few
Grated Coconut-1 cup

Procedure :

1.Take all the ingredients given for roasting and grinding except coconut and sesame seeds ,and roast them till they are golden brown and nice aroma arises.Keep them aside to cool.


2.Roast the grated coconut in low flame for 5 mins and keep it along with the other roasted ingredients above.


3.Now keep the flame high and allow the wok to heat up.Then add the sesame seeds to it and keep stirring it.The sesame seeds will splutter rendering a nice aroma.Do not allow them to burn.Once the spluttering stops,remove them and keep it with the other ingredients that are already roasted to cool down.


4.Now grind all the roasted ingredients to a fine paste by adding a little water.


5.Soak the tamarind in water and extract its juice.Boil the tamrind extract till the raw smell goes off.


6.Boil all the vegetables mentioned above with required salt,hing and turmeric powder and add the tamarind extract to it and simmer it on low flame.


7.Now add the ground paste and the fresh grated coconut to the vegetable mixture.


8.After heating the thalagam on low flame for 5 minutes.switch off the flame and add coconut oil and curry leaves as garnish .


9.The thalagam is ready to be served.Serve hot with plain rice and appalam(papad).


Saturday, August 13, 2016

Pav Bhaji(Hot toasted buns with a vegetable gravy)


Well what to say ! I have absolutely No words to describe the Pav Bhaji as it is one of my most favorite dish . Whenever I make Pav Bhaji I would love click pictures but the moment it is ready I forget everything and just gobble it up with hot toasted Pav buns! I just love the Bhaji with vegetables well mashed and here goes the recipe of my favorite dish !


Preparation time :25 mins
Serves:4

Ingredients :

Mixed vegetables ( potatoes,carrot,cauliflower,beans,capsicum peas)-2 cups
Big onion chopped-1 no
Chopped tomatoes-2 nos
Ginger garlic paste-2 tsp
Jeera or cumin-2 tsp
Turmeric powder-1 tsp
Chili powder-1 tsp or as desired 
Pav Bhaji masala-1 tbsp
Salt - as needed
Oil-1 tbsp

To garnish:
Butter-1 tbsp
Chopped Coriander leaves-a few
Sliced lemon-1/2 
Chopped raw onion-1 tbsp

Procedure :

1. Heat a wok with 1 tbsp of oil and add the cumin seeds.After it splutters add the chopped onion and sauté well till the onion turns transparent . 


2. Now add the ginger-garlic paste and mix well.After the raw smell goes off add the tomatoes,salt,turmeric powder,chili powder and the Pav Bhaji masala and sauté till the tomatoes are soft .

3. In a pressure cooker add all the vegetables and cook them for 5-6 whistles and mash the vegetables to a semi purée. Add the onion tomato mixture to the mashed vegetables .


4.Mix everything well and add a little water if it's too thick and boil it for 5 mins in low flame.Switch off the flame and garnish with chopped coriander leaves and chopped onion.Serve with hot Pav buns with a dollop of butter on top.Delicious Pav Bhaji is ready !


Tips :
  • You can add a slice of lemon along with Bhaji .
  • Reduce or add more of chili powder according to your spice level.


Monday, August 1, 2016

Pindi Chole Recipe (Chickpeas cooked with a special spice powder)


This is one of the fantastic recipes which I got to try after tasting my friend's pindi chole along with ajwain poori. It was too yum and the taste was lingering in my mouth for a long time .It made me call my friend to get the recipe and to try it the same weekend .it was a great hit with my family as they liked it more than the ones served with batura at the restaurant.The recipe called for homemade special masala powder which rendered very delicate flavour to the dish.


Ingredients:

White Channa or chickpeas -2 cups
Tea bag-1 or tea infusion -1/4 cup
Cumin seeds-1 tsp
Tomato purée -from 3 tomatoes
Oil-2 tbsp
Fresh coriander leaves-for garnish
Fried potato cubes(optional)-for garnish
Fried green chilies(optional)-for garnish

A)To be roasted and grinded to a fine powder:
Dhaniya or coriander seeds-1 tbsp
Cumin seeds or jeera-1 tsp
Bay leaf-1 
Cinnamon - 1 inch stick
Cloves-1 no
Cardamom(preferably black)-1 no


B)To be grind to a fine paste:
Green chillies -2 no
Onions-2 big ones
Garlic-4 no
Ginger-1 inch
Fresh coriander-1/4 cup

Procedure:

1.Soak the chickpeas with a tea bag or tea infusion and pressure cook it along with the tea bag for 8 whistles or till soft .


2.Dry roast the ingredients given in A) till nice aroma arises and powder them dry in a mixer. 


2.Grind the ingredients given in B) to a fine paste by adding a little water.


3.Heat the oil in a wok and add the jeera seeds .Once it  splutters ,add the onion mixture paste and saute till the raw smell goes off.


4.Then add the tomato purée, salt and mix well.Once it is sautéed well add the powdered masala powder .


5.simmer the flame and cover it with a lid.Once the gravy is thickened switch off the flame and garnish with coriander leaves.


6.Hot and yum pindi chole is ready to be served with batura or poori  topped with fried green chillies and potato cubes or chopped onion .


Tips:

*Soak the chickpeas overnight.
*The consistency of the chole is semi dry but if you wish you can make it as a gravy also.

Wednesday, May 11, 2016

Eggless Chocochip Cookies


Chocochip cookies were always on my to cook list ,but somehow it got postponed .Finally with some encouragement from my sister -in-law to bake something in her vintage stove top oven I finally decided to give these cookies a try and got the recipe from here and tailor made it according to my taste.These Chocochip cookies were absolutely crunchy and make you want to eat more again and again .we finished this batch in a day itself.


Makes:15-17 cookies
Preparation time :30 mins

Ingredients
  • 1 cup whole wheat flour or plain flour
  • ⅓ cup powdered sugar (I used turbinado sugar)
  • ⅓ cup butter,at room temperature.
  • ½ cup chocolate chips
  • 1/2 tsp pure vanilla extract
  • A little milk to make the dough

Procedure:

1.Preheat oven at 180C.In a bowl cream the butter and sugar together .


2.Then add the vanilla extract and the flour and mix well.


3.The mixture will look like below (like crumbled).Add the chocochips and a little milk.


4.Mix well and gather it like a cookie dough.Then take a small portion of the dough in hand and flatten it.


5.Place the flattened dough on the baking tray which is greased priorly. Bake them at 180 C for 10-12 mins or till the cookies are baked.The cookies will be soft initially but after it cools down it turns very crunchy.Yummy Chocochip Cookies are ready to be served. Store them in an airtight container.


Tips:

  • The original recipe called for 1/4 tsp of baking powder but I omitted it. The cookies came out well even without adding it.You can add it if you wish.
  • For a dark Chocochip cookie you can add 1 tbsp of cocoa powder to the dough. 


Thursday, May 5, 2016

Mum's Homemade Fruit Jam(No preservatives)


This is my 100 th post and I am glad it's very sweet.I am not a great fan of jams but son indeed is .But I don prefer the store brought ones though they are tasty.They are loaded with chemicals like food colors,preservatives and artificial flavors which trigger allergy and wheezing in kids.As I was refusing to buy my son jam,my mom sent me a bottle of delicious homemade mixed fruit jam with no preservatives and has the goodness of the real fruits .My son loved it and the bottle got over in a month.I wanted to try it and got an opportunity to make it this time at my mom's place where I am right now , spending my summer vacation .


Preparation time :30 mins
Prepares:150g approx

Ingredients:

Mixed fruit pulp (papaya,chickoo,mango,banana,Apple)-2cups
Sugar-2 cups
Lemon juice-1 tsp
Tonovin essence -1 tsp


Procedure :

1.Heat a wok and add the fruit pulp and sugar and keep mixing well in medium flame .

2.Once all the sugar has dissolved,add the lemon juice and mix well.


3.Once the mixture starts to thicken ,add the tonovin essence.


4.Keep on mixing and the mixture turns glossy and dark in color. Simmer the flame.


5.Glass jars are generally preferred for jams and one must wash it with soap and hot water and air dry it beforehand.As I didn't have an appropriate glass  jar I used a stainless steel one.But please do not use plastic ones even if they are food grade.The  right stage for the jam to be ready is when you  drop a spoon of jam on a plate it should stay still like a pearl or not runny.Then our jam is ready.


6.Transfer the jam to the jar and once it cools down you can refrigerate it .Stays well for upto 2 months in the fridge and when used a clean and dry spoon for use.Enjoy this delicious ,healthy and wholesome homemade mixed fruit jam .


Tips:

*If you miss the pearl stage then the jam may get too rubbery and difficult to spread.
*I didn't add pineapple as I would like it to eat as a pineapple jam.
*Glass jars are always better to store jam.It should be clean and dry.
*Tonovin essence adds a nice flavor and color to the jam so better to add it.

Tuesday, May 3, 2016

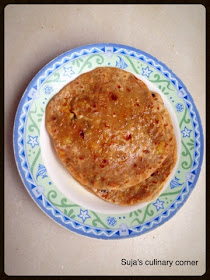
Gobi paratha/Cauliflower stuffed flat bread


Cauliflower is one of my family's favourite vegetable .I try to include it in most of my recipes like 


These Gobi parathas are very yummy when served with a dollop of butter ,a pickle and a raita. I prefer to chop or grate  cauliflower finely to get these parathas perfect otherwise boiling and mashing the cauliflower can sometimes make the stuffing retain too much moisture thus making parathas would be difficult .


Preparation time :40 mins
Makes:15 parathas 

Ingredients:

For the bread:
Whole wheat flour-1 1/2  cups
Salt-to taste 
Water -for kneading 

For the stuffing:
Cauliflower-150 gms
Finely chopped onion-1 no
Jeera or cumin-1 tsp
Turmeric powder-1/2 tsp
Chilli powder-1 tsp( adjust according to your need)
Ginger garlic paste-1 tsp
Kitchen King masala or garam masala-1 tsp 
Kasuri methi or dried fenugreek leaves-1 tsp
Salt-to taste
Oil-to toast the parathas
Butter/ghee - to serve 

Procedure :

1.In a large mixing bowl add the flour and reunited salt and add required water little by little and knead in to a soft dough.Cover the bowl with a lid and keep it aside.


2.Heat a wok with a tbsp of oil and add cumin seeds.After it splutters add the chopped onion and saute well.


3.When the onions turn transparent add the salt,turmeric powder and red chilli powder,followed by ginger garlic paste.Mix everything well.


4.Put the cauliflower florets in hot boiling water with a tsp of salt and after a minute refrain them and chop or grate them finely.Add this finely chopped cauliflower to the sautéed onion.then add the kitchen king masala .


5.Simmer the flame and cover the wok with a lid and let the cauliflower cook for few minutes.Then remove the lid and add the kasuri methi and mix well.Switch off the flame .Take a small ball size dough and roll in to a small chappathi and place two spoonfuls of the cauliflower filling inside it and wrap it inside the dough .


6.Dust some flour on the wrapped filing dough and roll out in to parathas. It should be neither too thick nor too thin.If it sticks to the rolling plate dust some flour and roll it out.Heat a non-stick pan and add a tsp of oil and place the paratha on top of it.Once it gets cooked on the downside ,flip it and add another tsp of oil so that both the sides are evenly cooked golden brown.


7.Serve hot with a pickle or tomato thokku and raita .Optionally you can add a blob of butter on top of the parathas before serving.


Tips:

*Roll out parathas evenly and lightly  otherwise the filling will come out when you roll out.
*Don't avoid kasuri methi as it adds a very nice flour to the paratha and it is healthy too.
*You can also add chopped coriander leaves to the filling.

Sunday, May 1, 2016

Musk Melon Granita


The scorching heat makes us to loose our energy fast and leaves us feeling drained .All one would want is to drink or eat something cool.This musk melon granita leaves you refreshed and is a natural cooler.Kids would love to have them during their holidays .Its very simple  to make and yet an appealing recipe.


Serves :6
Preparation time:15 mins and time to freeze

Ingredients:
Musk melon-1 no( medium size)
Turbinado sugar or powdered jaggery-2 tbsp or more if you are sweet toothed.
Honey-2 tsp for every serve 
Mint leaves-to garnish 

Procedure:

1.Peel the skin of the musk melon and chop them into medium size slices.Discard the seeds.In a juice blender,add the chopped fruits and sugar and beat them till they are puréed well.


2.Transfer the purée to a container and freeze for a minimum of 6 hours or overnight.


3.After a few hours give it a stir.once it is completely frozen ,use a fork or spoon to scoop out the granita .


4.Serve it in a bowl ,drizzle 2 tsp of honey on top and garnish it with fresh mint leaves .Serve chilled.